
Sub-Child Workflows
Sub-child workflows are linked to child workflows. They allow you to add additional services to an existing child workflow for extended functionality.
A sub-child workflow can only belong to a child workflow. When creating a sub-child workflow, a pop-up will display all child workflows under the parent workflow, and you must select one to continue.
How to create Sub-Child Workflows
-
Access the QoreID landing page
Go to the QoreID landing page. All workflow cards are displayed at the bottom of the page.
-
Select “Add Sub-child Workflow”
From the dropdown menu, select Add sub-child workflow. This opens the workflow editor.
-
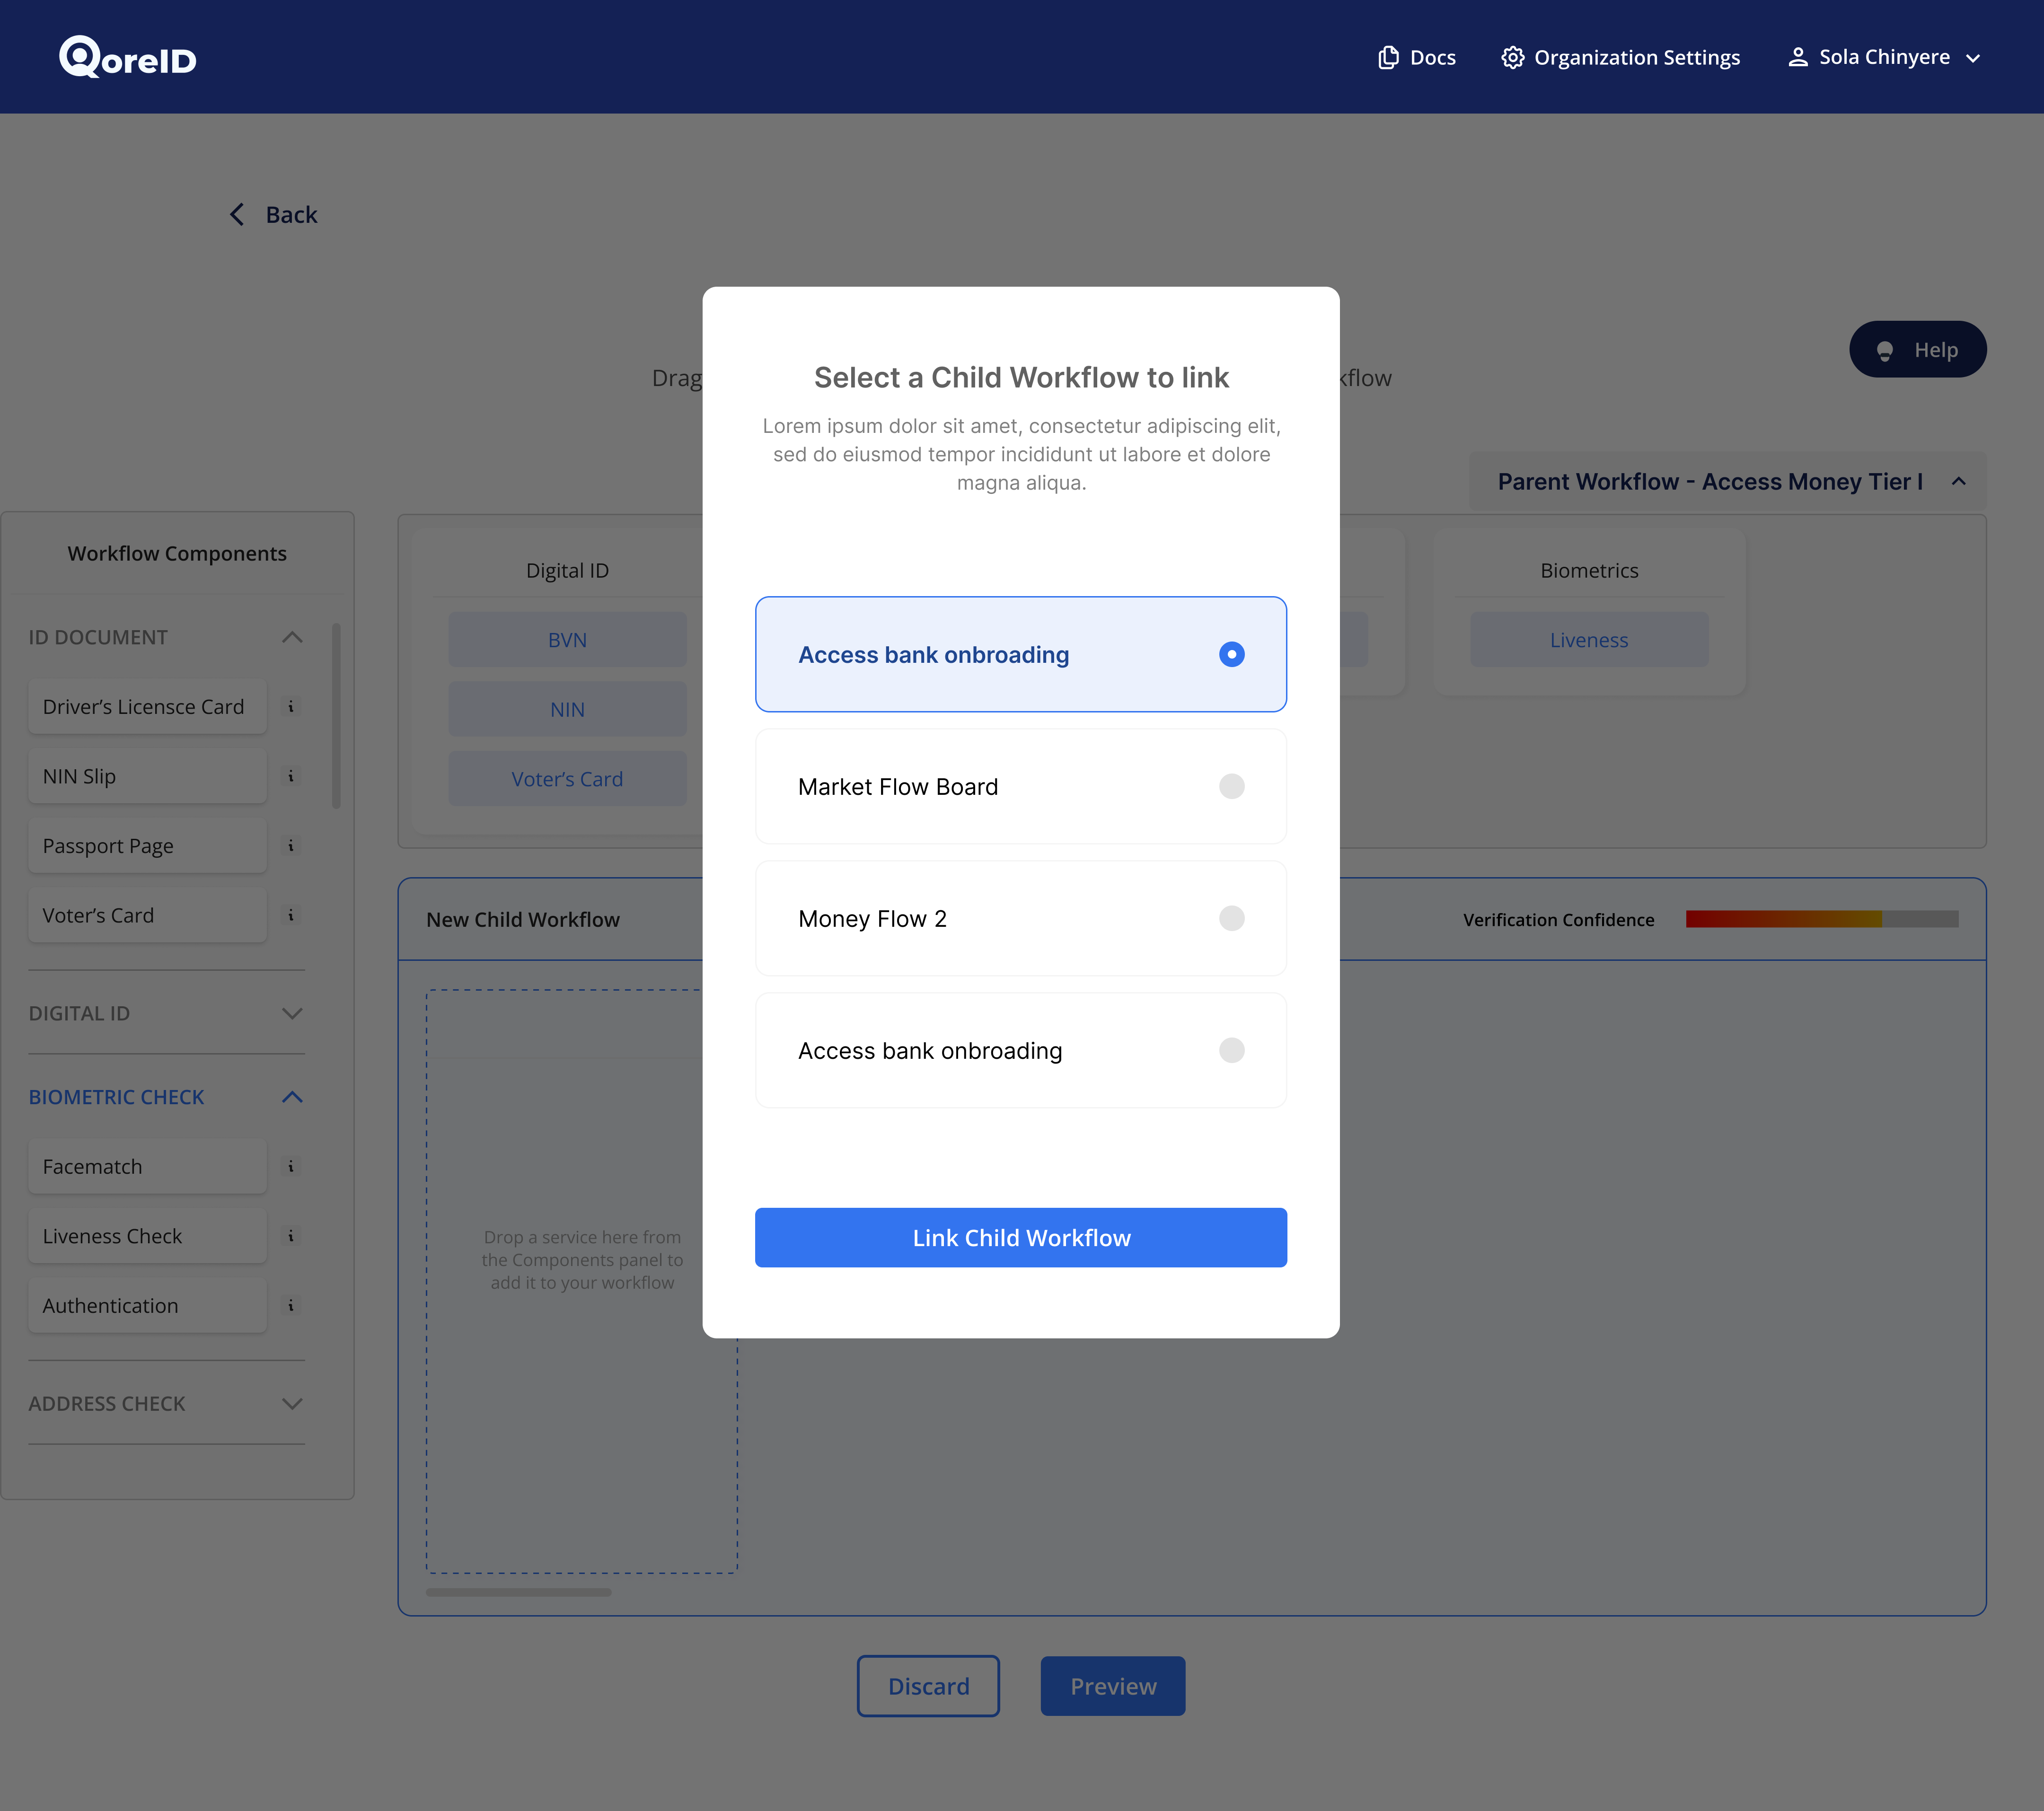
Select the Child Workflow that the sub-child will belong to
Sub-child workflow can only belong to a child workflow. While creating a sub-child workflow, there will be a pop-up that shows all the child workflows associated with the parent workflow and requires the user to select one of them to proceed.
-
Drag new services required in the Sub-Child Workflow into the Workflow editor
The editor shows a preview of the parent and child workflows. Services already included in either cannot be duplicated.
If you attempt to add an existing service, an error message will appear. -
Preview of Sub-Child Workflow
Review the services included in the sub-child workflow.
-
Save the Sub-Child Workflow
Click Save. The sub-child workflow is automatically added under the selected child workflow.
Updated 6 months ago